Google Analytics

Saturday, 13 April 2013

Olight M22 Warrior Flashlight Review

Olight M22 Warrior Review

This new flashlight from Olight features the newer LED the XM-L2. When it was first released, a lot of people had different reactions towards its looks. Some liked it, and some hated it. Personally, it looks like a standard 18650 thrower, and it looks similar to the nearest competitors.

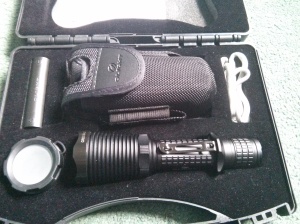
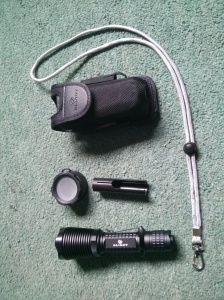
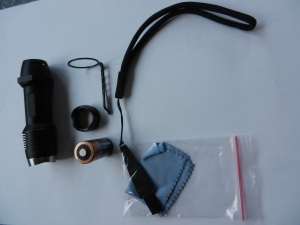
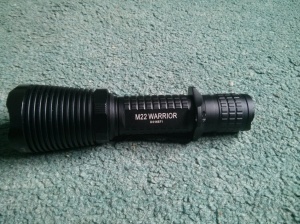
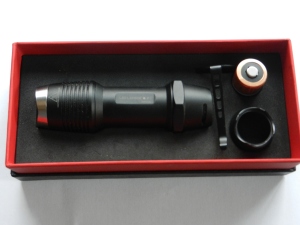
It arrived in a lovely package, that included the M22, a diffuser, a holster, a CR123 magazine, a good quality lanyard, and a small package that includes 3 O-rings and a spare glow in the dark tail switch. The M22 gives out 950 lumens on high which has a beam range of 305m. It comfortably lights stuff up to about 200-250m, but I can see trees (just about) that are 300m away.
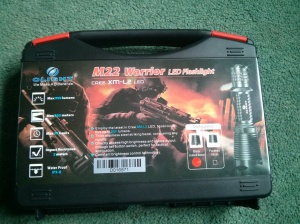
IMG_20130413_131703IMG_20130413_131818IMG_20130413_131920

In hand, the M22 feels extremely well built, and the knurling on the body ain't too aggressive. The words on the body are well machined on with no slight mistakes. The head features a lot of cooling fins that help to lower the chance of overheating. The bezel is well made, and has the words "Hot Surface" and "Cree XM-L2" laser etched to each side.
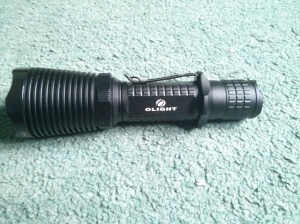
IMG_20130413_132012IMG_20130413_132022

One thing that might put some people off from buying this flashlight is that it can't tail stand. It also features a tactical ring, that allows users to hold the flashlight with the cigar hold. This ring is removable but it will reveal an O-ring. It also has a pocket clip. The design of the clip helps to hold the tactical ring in place. The metal contact in the tailcap maintains contact because it has a spring beneath the gold contact. The rear threads are well lubed and look of extremely high quality. Inside the battery tube, there's a shiny sticker that shows the user which way the battery goes in.
The head doesn't have anodised threads because the UI requires the head to be loosened and tightened. There is also a spring gold contact near the head, so the battery will not rattle about, and it should always maintain contact.

The reflector is smooth and deep, which gives a throwy beam, which also lights up a good area. The walls of the flashlight are quite thick, and should be capable of a good beating. The bezel is easily removed which reveals a glass lens with a red O-ring.
The included diffuser fits on snuggly to the head, and works flawlessly. The diffuser also has a loop that can be mounted to the lanyard.
The holster is probably one of the best ones I've seen. It's made of a high quality material, so it keeps it's shape. On each side, there's a loop to hold spare 18650 batteries. The loops hold the batteries in place really well. There is a hole at the bottom of the holster so the flashlight can be used when its packed away. The holster can be mounted to a belt or a carabiner. I hope that other brands will soon follow the design of this Olight holster.
The user interface is very simple on the M22. You loosen the head and then tighten it to move from one mode to another. Low-Medium-High. There is also a hidden Strobe mode. To access the strobe, you'll have to press the switch momentary 3 times. Personally the strobe flashes at a good rate to temporarily blind someone. It ain't too fast, like some of the other flashlight I've used. When the flashlight gets quite hot on high, it will move down to a lower mode, to protect the LED.

If you're looking for a powerful tactical flashlight, the M22 might be the flashlight for you. It rivals other flashlights that cost quite a bit more.


Please Like, Comment with any questions, and follow for more reviews soon!!
Monday, 25 March 2013

Led Lenser F1 Flashlight Review

Led Lenser Flashlight Review

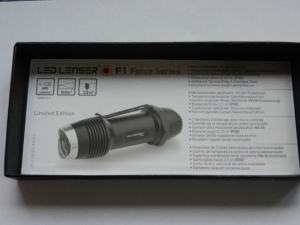
Thank you Led Lenser for sending out a F1 flashlight to review. The flashlight arrived well packaged in a lovely gift box.DSCN1049

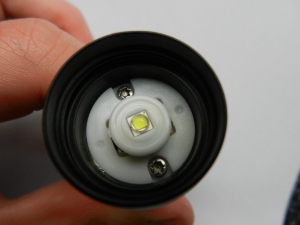
The box included the F1, a Duracell battery, a pocket clip, a spare bezel, a wrist lanyard, a cleaning kit, and some documents. Inside the lid of the box, there are some details about the F1. It shows all the specifications, including saying it has 400 lumens, 100m beam range, and waterproof to 2.5m. The build quality is excellent with every piece joining each DSCN1050other with no problem. The Cree LED sits perfectly centered, and gives out a perfect beam of light. The hotspot is very bright, and can comfortably reach passed 80m. Built to the tailcap is a hexagon shape that stops the flaDSCN1053shligh from rolling off of flat surfaces. This works very good, while still making the flashlight lovely to look at. The steel bezel at the front is interchangeable with the tactical bezel which is included in the box. The tactical bezel is capable of breaking glass in emergencies. Also near the head are some grooves that help with lowering the chance of  overheating (the flashlight does get hot when used for long periods on high).

The included pocket clip can be mounted at the rear or the front, with 360 degrees of possible places to be mounted. There is a notch in the tailcap that holds the lanyard in place. The flashlight can talstand, butit's a little harder when the lDSCN1051anyard is mounted. One thing that sets this flashlight apart from other Led Lensers is that the beam is not focusable. This is not a problem, because the lens creates of very tight hotspot, while still glowing up a good area. The flashlight only measures 88 x 27.5mm, and it gives out 400 lumens. Its powered off of one CR123 battery, and can lastt up to 2 hours. The F1 includes SLT (Smart Light Technology), so the flashlight has 3 modes: High, Low, and Strobe. It gives out 400 lumens on high, and the low gives out 60 lumens. If you shine the strobe into someones eyes, you'll most probably temporarily blind them (This is why it's a tactical flashlight).

If you're looking for a very high powered tactical flashlight that fits in your pockets, this is the flashlight for you. The only downside I could find is that the batteries don't last last very long, and that the flashlight doen't allow rechargeable CR123's. Overall, this flashlight is very good value for money.

More information on the F1 can be found at http://www.ledco.co.uk/content/productView.aspx?prodId=92

You can buy the F1 from Amazon at http://rcm-uk.amazon.co.uk/e/cm?t=trissrevi-21&o=2&p=8&l=as1&asins=B00A39OVF8&ref=qf_sp_asin_til&fc1=000000&IS2=1&lt1=_blank&m=amazon&lc1=0000FF&bc1=000000&bg1=FFFFFF&f=ifr

Please Like, Comment with any questions, and Follow for more reviews soon!!

Sunday, 3 March 2013

MuckyNutz Bender Fender Review

MuckyNutz Bender Fender Review
image

The Bender Fender from MuckyNutz is probably the most simple front mudguard around. Despite it's simple form factor, it does an impressively good job at stopping mud/water being flung up into your face. The Bender Fenders are made by the small Sheffield based company MuckyNutz. It arrived yesterday as a sheet of plastic and a roll of velcro. The included instruction manual stated clearly that you need to cut the velcro into 5 equal sizes (about 16cm), and then attach it your forks.

It was very easy to fit onto my forks, and it has stayed firm ever since. It doesn't show a sign of coming loose after a thrashing ride today. Because it sits so close to the tyre, it doesn't allow mud to be flung forward into my face. Because of the shape, it stops mud from also being flung to the side (total opposite of the RRP Neoguard).
For all you weight weenies out there, you will not be dissapointed with the Bender Fender, which ways only 16g. This is mostly because the plastic used is very thin and flexible. Its easily the lightest mudguard around, and it works flawlessly.

Verdict
The Bender Fender is the lightest mudguard around, and it stops EVERYTHING from being flung into your eyes. It's also a real bargain when you compare it's price to the other contenders out there. If you buy the Bender Fender you will not be dissapointed

http://www.muckynutz.com/ also sell Butt Fenders and Gut Fenders which protect other parts of your body from the mud.
If your in the UK, you can buy they're products directly from them at http://www.muckynutz.com/ or you can buy it from amazon at http://rcm-uk.amazon.co.uk/e/cm?t=trissrevi-21&o=2&p=8&l=as1&asins=B00BYR68RC&ref=qf_sp_asin_til&fc1=000000&IS2=1&lt1=_blank&m=amazon&lc1=0000FF&bc1=000000&bg1=FFFFFF&f=ifr

Saturday, 2 March 2013

Leatherman Rebar Multitool Review

Leatherman Rebar Review

Leatherman Included

First of all, thank you to Leatherman for sending me this product to review.

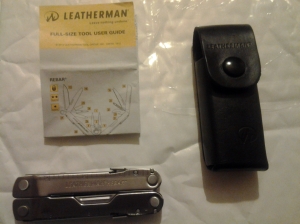
The product arrived packed in a clam shell. Included in the package were the tool itself, a leather sheath and a manual/product catalog. After opening the clam shell, the first thing I realised was the difference in size and weight compared to the Super Tool 300. The Rebar has basically the same tools as the Super Tool 300, but packed in a smaller body.

Measurements

Leatherman Rebar Length

Leatherman Blade Length

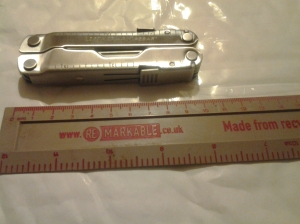
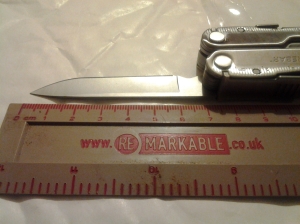
When closed the Rebar measures 10.16cm in length, weighs in at 189.94g, and has a blade length of 7.36cm.

Tools

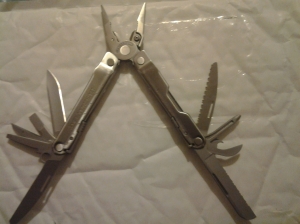
Leatherman Tools

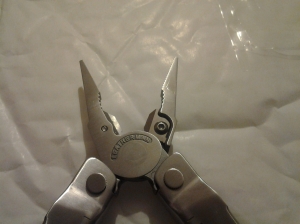
Leatherman Pliers

The most obvious tool on the Rebar is the pliers which has a set of removable 154cm hard/standard wire cutters. These are attached to the plier head by small torx screws. These wire cutters can cut through a bike spoke, but i doubt it for anything much larger in diameter. The tip on the plier head is pefectly crafted and the two ends meet together perfectly. Because the needlenose pliers are so point, the pliers can be used in small spaces, while you can also use them to grab stuff about half inch in diameter. For me, the pliers on the Rebar are the perfect size, and they are very strong. There is no sign of weakness when you put pressure on them.

There is also a wide rangle of screwdrivers on the Rebar. It has one phillips head, and 2 flat head screwdrivers. The larger flast head measures 7mm in diameter and the smaller one 3mm. I find these two sizes to be the most popular in day to day life. The design of the phillips head means it can be used with larger and smaller screws.

The next tool I'm going to talk about is the awl. Many people love to have an awl on they're tools because it's so versatile. The main use of an awl is probably using it as a leather punch. It also has a needle eye near the tip, and the machined edge is at an angle so it can also be used as a scraper.

By now, people consider a saw as a standart tool on a multi tool. The saw on the Rebar has a functional length of 56mm. Its been desied, so the saw is thickest where the teeth are, so it decreases the chance of the saw getting stuck.. The teeth are crafted to the highest standard, and they're all pefectly shaped.

For years, Leatherman files have been much better than those of other brands. The file on the Rebar has a different design on both sides of the blade. On one side the file is designed for wood, and the other side is a diamond file designed for harder materials. At the bottom edge there is also file which can be used as a hacksaw on small tasks.

The can/bottle opener on the Rebar opens cans with ease an it can also open a variey of bottles. At the base of the can opener on the Rebar, there is a V-shaped notch which is designed as a wire stripper.

The most hidden tool on the Rebar is the wire crimpers. These are located inbetween the handles, opposite to the pliers.

There are two knife blades on the Rebar which measure 7.36cm in length. These blades are made out of 420HC steel. 420HC steel is easy to sharp, and it retains a good edge. There is one plain blade, and one sheepsfoot serrated blade. These two blades are easy to access because there is a cut out in the REbar's body. The serated blade is designed to cut through rope, and open packages, while the plain blade is designed to everyday tasks (such as opening letters).

The last tool on the Rebar is the lanyard, which is not exactly a tool but more of an accessory. Some people like lanyards, and some people don't like them. Personally I'm not fussed with lanyard, but the lanyard on the Rebar seems to be of a good size to hold a variety of rope sizes.

There is also another accessory on the rebar which you may not have seen. This is the ruler. It's been machined into the body and can measure up to 20cm. The lock on the Rebar is a very simple one, but it does its job very effectively. It's a rocker-type kind of lock.

The Body/Accessories

At the two joints between the body and the pliers, the body has benn narrowed down so its more comfortable to hold when open. Another way that Leatherman have made the Rebar more comfortable to hold is by turning the edge of the body inwards, so it doesn't cut into your hands when applying pressure.

The leather sheath which came include in the package is held together by 4 rivets. It's very well made but I have one quite major criticism about it. The snap buttons that open/close the sheath are quite stiff and hard to open. Over time, I hope that the snap buttons will eventually become smoother because this is quite a big problem at the moment.

Conclusion

Personally I think that the Rebar from Leatherman is a great value for money tool, which is perfectly crafted with no flaws in the steel work. At the beginning the joints were quite stiff, but after opening and closing the tool for a few minutes, it works perfectly. I think that you can't go wrong with buying the Rebar, especially with it's low price point, for the amount of tools you're having.

You can buy the Rebar from amazon at http://rcm-uk.amazon.co.uk/e/cm?t=trissrevi-21&o=2&p=8&l=as1&asins=B007ERHK3M&ref=qf_sp_asin_til&fc1=000000&IS2=1&lt1=_blank&m=amazon&lc1=0000FF&bc1=000000&bg1=FFFFFF&f=ifr